Are you mesmerized by the shifting, galactic shimmer of Cat Eye Nails but struggle to recreate the look at home? You aren't alone. While "Velvet Nails" and "Galaxy Effects" are taking over Instagram and TikTok, the secret isn't just the polish—it’s how you handle the magnet.
In this guide, we break down the science behind the shine and teach you 10 professional magnetic techniques. Whether you want a sharp "cat eye" slit or the trending soft "velvet" look, master these steps to elevate your DIY manicure game.
Table of Contents
The Secret Sauce: How It Works
Before we paint, let's understand the "why." Cat Eye Gel contains tiny magnetic iron particles. When the gel is wet, these particles are free to float. When you introduce a magnet, the particles rush toward (or away from) the magnetic field, creating those 3D light bands.
Crucial Rule: Once you cure the gel under the lamp, the particles are frozen in place. Always manipulate the magnet while the gel is WET.
What You Need
Get your station ready. To achieve these looks, you will need:
- ☐ Cat Eye Gel Polish (Shop our Best Sellers)
- ☐ Base Coat & Top Coat
- ☐ UV/LED Nail Lamp
- ☐ Magnet Tools:
- Cylindrical Magnet (For Velvet/Wide effects)
- Double-Headed Magnet Stick (Rectangular flat + Round head)
- Flower/Pattern Magnet (Optional for instant art)
Universal Step-by-Step (The Basics)
No matter which design you choose below, start with these foundation steps:
- Prep: Clean, file, and buff your nails.
- Base: Apply Base Coat and cure (60s).
- Base Color (Optional): Apply a black gel base for maximum contrast, or a jelly nude for a soft look. Cure.
- Apply Cat Eye Gel: Apply a smooth layer of your magnetic gel. STOP! DO NOT CURE YET.
- Magnetize: Perform one of the 10 techniques below.
- Flash Cure: Immediately cure for 60 seconds to lock the design.
- Seal: Finish with a Top Coat and cure.
10 Professional Magnetic Techniques
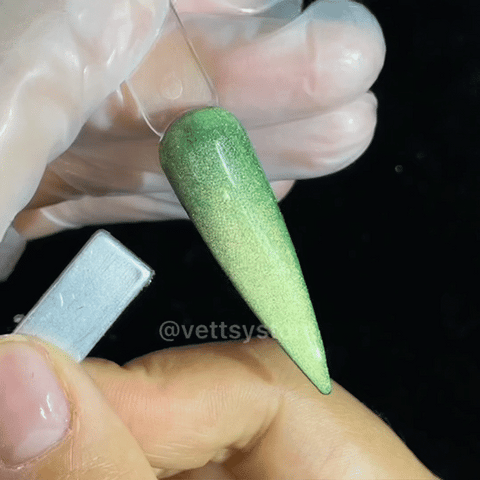
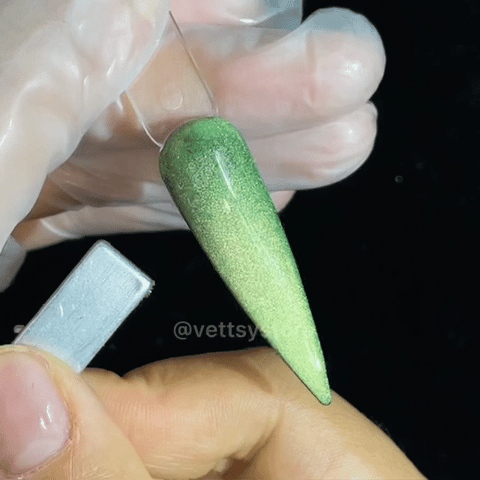
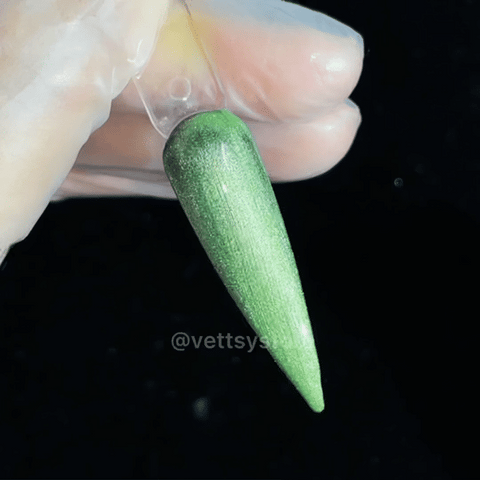
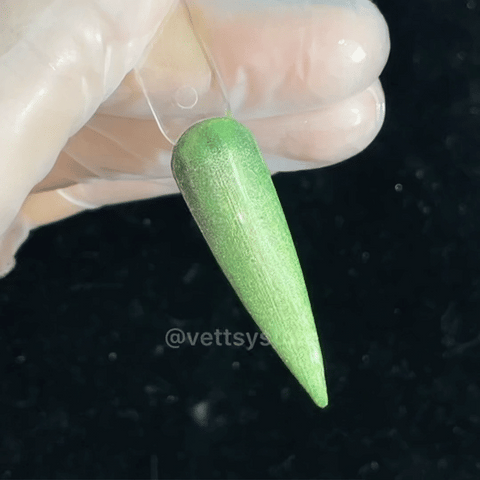
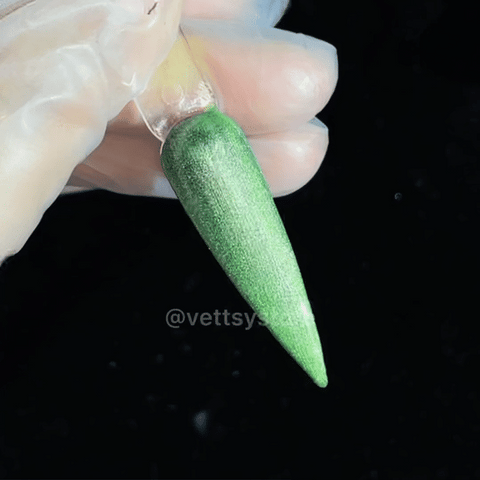
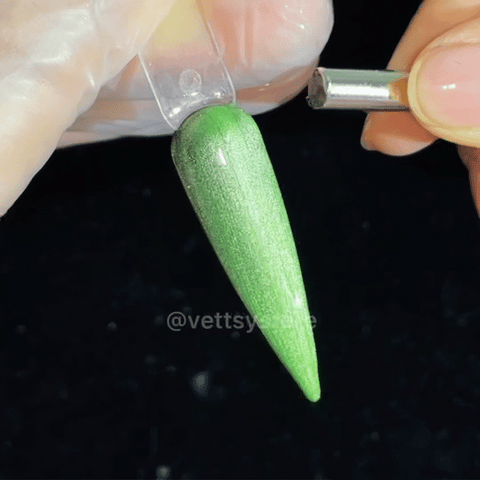
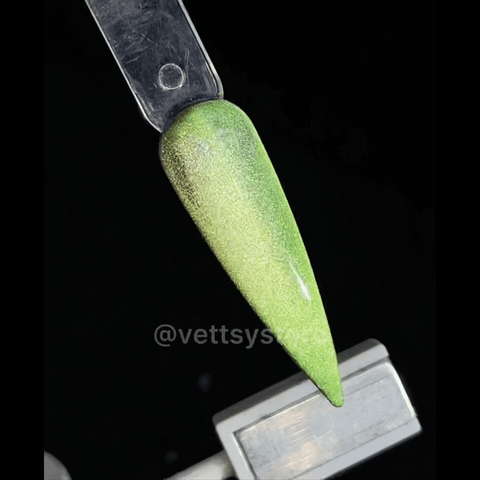
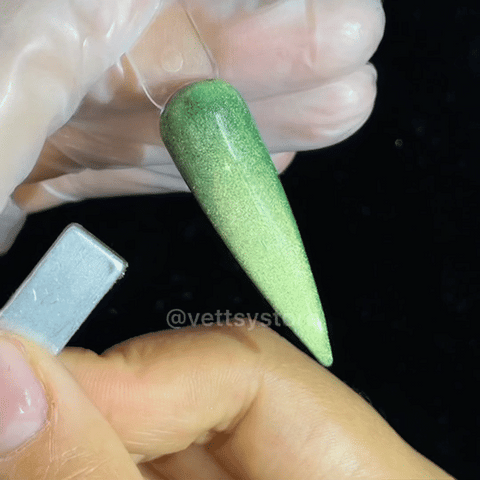
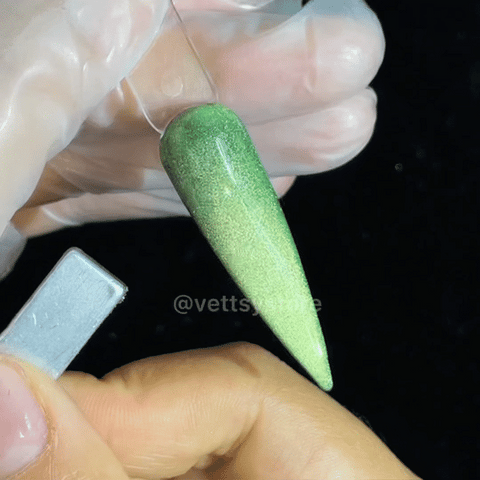
1. The Velvet Effect (Wide Cat Eye)
Currently the #1 Trend on Social Media. And the Wide Cat Eye Effect is the foundation for many advanced looks. It pulls the magnetic particles toward the center of the nail, creating a broad, velvet-like shimmer.
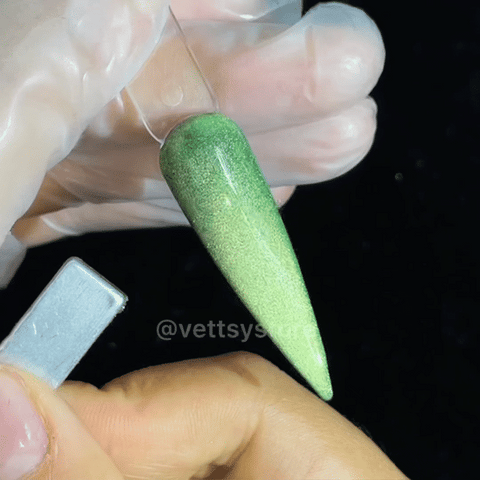
Tool Required: Vettsy Cylindrical OR Long Rectangular Magnet.
Step-by-Step:
- Hold the Vettsy Magnet parallel to the side of the nail, about 0.5cm away from the wet gel.
- Sweep the magnet once or twice along the left side to push the particles toward the center.
- Repeat the same sweeping motion on the right side.
Pro-Tip: Ensure you do not touch the wet gel. If the "line" looks too sharp, gently shake the magnet further away to soften the glow into a "velvet" finish.
2. Classic French Cat Eye
This technique reimagines the timeless French tip using magnetic light instead of white polish.
Tool Required: Vettsy Square Magnet
Step-by-Step:
- First, follow the steps for the Wide Cat Eye (Effect #1) to distribute the shimmer evenly.
- Take the narrow side (the edge) of your Vettsy Square Magnet.
- Position the edge parallel to the nail, starting at the cuticle.
- Slowly move the magnet toward the free edge (the tip). This "pulls" the light to the top of the nail, creating a crisp, shimmering smile line.
3. Cat Eye Ombre (Gradient)
The Ombre effect creates a seamless transition from a dark base at the cuticle to a high-intensity magnetic shimmer at the tip.
Tool Required: Vettsy Square Magnet (Wide Side)
Step-by-Step:
- Start with a completed Wide Cat Eye base.
- Using the wide, flat side of the Vettsy Square Magnet, hold it horizontally near the cuticle area.
- Slowly "push" the light toward the free edge by moving the magnet down the length of the nail.
4. The Galaxy Strip (Sharp Line)
This is the most iconic cat-eye look—a single, crisp line of light that mimics the slit of a feline's pupil.
Tool Required: Vettsy Double-Head Magic Magnet
Step-by-Step:
- Apply a fresh layer of Vettsy Cat Eye Gel.
- Hold the rectangular end of the Double-Head Magic Magnet vertically or diagonally over the nail.
- Keep the magnet steady about 3–5mm above the nail for 5 to10 seconds.
- Lift the magnet straight up to avoid blurring the line.
5. The X-Cross (Future Tech)
The Cross effect adds a geometric, futuristic dimension to your manicure by intersecting two lines of light.
Tool Required: Two Vettsy Double-Ended Magnets
Step-by-Step:
- Hold two magnets so the narrower (smaller) ends are attracting each other. Position them over the nail to form an "X" shape.
- Hover them steadily for 5-10 seconds.
Expert Tip: Using two magnets simultaneously creates a much sharper intersection than doing one line at a time.
6. Floating Ribbon (S-Curve)
The Ribbon effect creates a wavy, flowing path of light that looks like silk moving under the gel surface.
Tool Required: Two Vettsy Double-Ended Magnets
Step-by-Step:
- Align two magnets side-by-side but slightly "misaligned" (one slightly higher than the other).
- Bring the narrow ends close together.
- Hover the pair over the nail for 5 seconds. This "pulls" the magnetic pigment into a curved, ribbon-like path.
7. Oblique French (Side Swipe)
Unlike the Classic French, this focuses the light on the corners of the free edge for a modern, asymmetrical glow.
Tool Required: Vettsy Cylindrical (Round) Magnet
Step-by-Step:
- Take the Vettsy Cylindrical Magnet and hover it near the right corner of the nail tip.
- Sweep it twice toward the center.
- Move to the opposite side and sweep once. This creates a rounded, "puddle" of light at the tip.
8. Black Hole (Space Effect)
This is a trending high-contrast look where the center of the nail appears dark, surrounded by a ring of intense shimmer.
Tool Required: Two Vettsy Double-Ended Magnets
Step-by-Step:
- Apply the Wide Cat Eye base first (see Effect #1).
- Hold one magnet an inch away from the free edge and the second magnet close to the cuticle.
- Slowly move the top magnet toward the center until the pigment "parts," revealing a dark "black hole" in the center.
9. Instant Flower Pattern
For those who want instant nail art without manual sweeping, pattern magnets do the work for you.
Tool Required: Vettsy Flower Pattern Magnet
Step-by-Step:
- Apply a generous layer of Vettsy Cat Eye Gel.
- Hold the flower-shaped end of the magnet directly over the center of the nail.
- Keep it perfectly still for 5 seconds. The magnetic particles will pull into a floral petal shape instantly.
10. Wild Zebra (Texture)
This creates a multi-tonal, textured look that mimics exotic animal skins.
Tool Required: Vettsy Pattern Magnet (Reverse Side)
Step-by-Step:
- Start with a Wide Cat Eye base.
- Use the side of the pattern magnet (the textured edge).
- Move it horizontally from left to right three times in a "raking" motion. This breaks the light into several small, jagged lines.
Quick Guide: Which Magnet Do I Use?
| Desired Effect | Best Tool | Difficulty |
|---|---|---|
| Velvet / Soft Shimmer | Cylindrical Magnet | Easy |
| Sharp Line / Galaxy | Standard Flat Magnet | Easy |
| French Tip | Small Rectangular Magnet | Medium |
| X-Cross / Black Hole | Two Magnets | Advanced |
Troubleshooting & FAQs
To help you get the best results with your Vettsy products, we’ve answered the most common questions from our community:
Q: Why is my cat eye effect disappearing or getting blurry?
A: You likely waited too long to cure. The magnetic particles will slowly drift back to their original position.
Pro Tip: Work on one nail at a time. Magnetize it, then immediately "flash cure" (put it under the lamp) for 10 seconds to freeze the look before moving to the next finger.
Q: Can I use any magnet for cat eye gel polish?
A: While any strong magnet will move the particles, Vettsy Professional Magnets are specifically designed with the correct polarity and strength (Neodymium) to create sharp, defined lines without blurring the polish.
Q: Do I need a black base coat for cat eye gel?
A: It depends on the look! Using a black base coat makes the magnetic "light" pop with high contrast. However, many of our Cat Eye Gels look stunning on a clear or nude base for a "velvet" look.
Q: How close should I hold the magnet to the nail?
A: For the crispest results, hold the magnet 3mm to 5mm away from the wet gel. If you are too far away, the effect will be faint; if you touch the gel, you will have to re-apply the coat.
Ready to Try It?
Cat eye gels are the most versatile tool in your nail art kit. Don't be afraid to experiment with magnet angles!
Shop Cat Eye Gels

